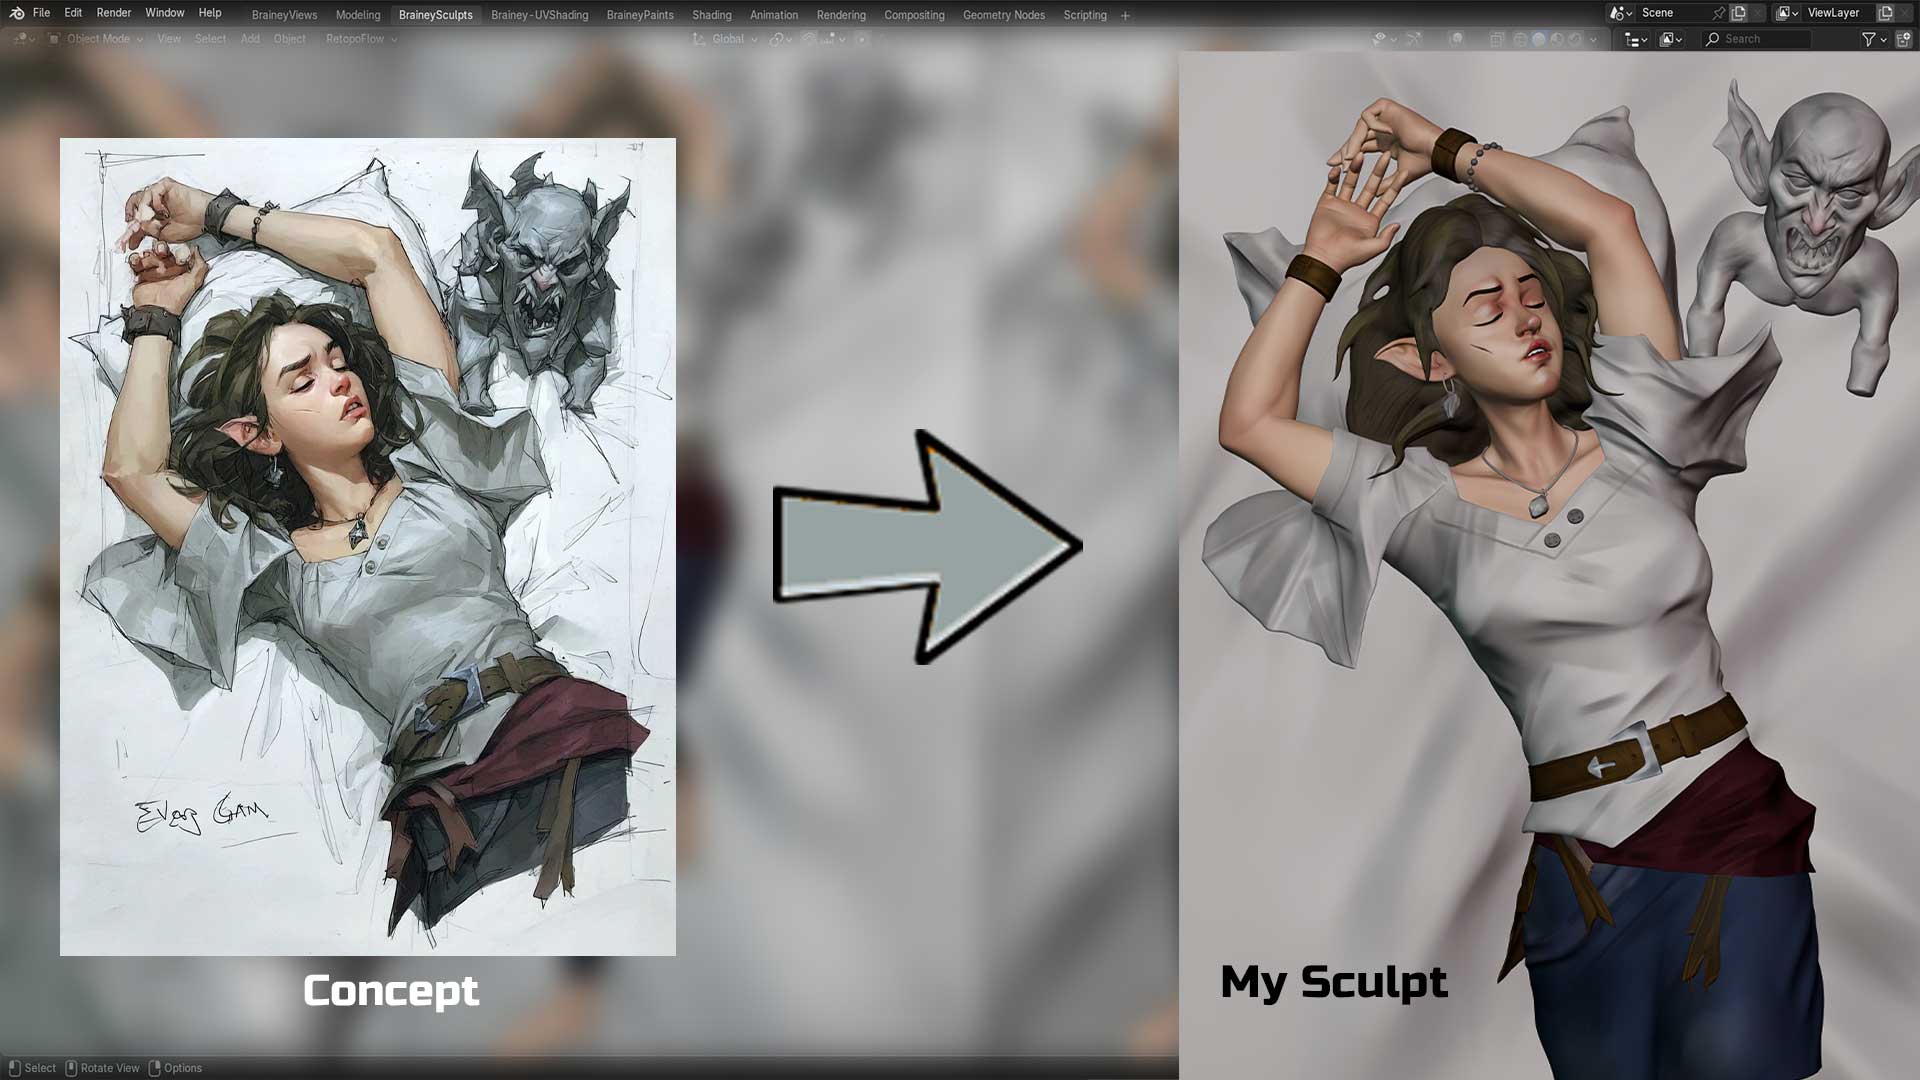
The Reference That Started It All
I came across a piece credited to Ev Ganin on Pinterest — a dark-haired girl lying back, arms stretched above her head, a horned creature crouched menacingly behind her shoulder. The composition was dramatic. The rendering felt polished. I saved it immediately.
Before I started blocking anything out in Blender, something in the brushwork didn’t sit right. The textures, the way light fell across the fabric — it had that particular quality that starts to feel familiar once you’ve spent enough time around AI-generated imagery. I dug a little deeper. The piece traced back to Midjourney.
What That Changed — And What It Didn’t
Finding out the reference was AI-generated didn’t kill the project. If anything, it made it more interesting.
The original image only showed the character from roughly the waist up. No lower body. No indication of how the outfit continued past the belt. No legs, no stance, no ground to stand on. All of that would have to come from anatomy knowledge, creative decision-making, and a lot of time staring at the Blender viewport.
So that’s what I did. I decided to sculpt not just the half-body portrait that existed, but the full character — everything the AI never bothered to imagine.
The Sculpting Process
The entire piece was built in Blender, start to finish. Blockout first, then anatomy refinement, then clothing — the white linen top, the layered belt, the dark trousers, the wrist wraps. Texture painting was done directly in sculpt mode. The final renders came out of EEVEE.
The character herself is a fantasy elf — pointed ears, a pendant necklace, an expression somewhere between peace and pain. The creature behind her shoulder got its own anatomy work too, even though it’s partially cropped in the final composition. I wanted both figures to feel solid and real, not like background decoration.
It took more than 12 hours total, spread across multiple sessions. Real life doesn’t always cooperate with marathon sculpting sits — but I kept returning to it, pushing a little further each time, until it felt done.

AI vs. Hand-Sculpted — What the Comparison Actually Shows
This is the second piece in my ongoing AI vs. Hand-Sculpt series. The format is simple: I take the same reference, run it through an AI 3D generation tool (Meshy AI v6 in this case), and put that result next to what I built by hand.
It’s not about dunking on AI. The generated mesh has its moments — it captures the broad shapes quickly, and for a machine with no understanding of anatomy, it does something recognisable. But anatomy is exactly where it falls apart. The hands are broken. The clothing drapes wrong. The weight and story of the pose disappear entirely. Those are things that take a sculptor’s eye and real time to get right.
That’s the whole point of the series. Not that AI is worthless — but that hand-sculpting still produces something different. And that difference is worth showing.

Tools Used
- 🛠️ Blender — full sculpt, retopology, texture painting in sculpt mode
- 💡 EEVEE — final renders
- 🤖 Meshy AI v6 — AI 3D generation (comparison only)
Watch the Full Process
I don’t do tutorials. No narration explaining settings or walking through shortcuts. What I share is the raw process — watching the character come together from a rough blockout to a finished render, either in full or in a condensed version.
- 📽️ Watch Short Timelapse:https://youtu.be/24ChmS0uVBo
- ⚡ Watch Full Timelapse: https://youtu.be/e_Fss6Txo3M
- 👀 Watch Sneak Peek: https://youtu.be/WSojsJMQQ9w
- 🎞️ Watch Full Raw Process: https://patreon.com/c/BraineyBites
A Note on the Reference
This piece is a personal fan study based on a Pinterest reference credited to Ev Ganin. All original character design credit belongs to the original creator. This was created for skill development only and is not a commercial claim over the concept in any form.

