I Sculpted a 3D Male Character in Blender — Here’s What the Full Process Looks Like
There is something deeply satisfying about watching a blank digital canvas slowly transform into a fully realised character — layer by layer, stroke by stroke, light by light. That is exactly what this project is about.
This post is a look inside a complete 3D character sculpting process I did entirely inside Blender. No plugins. No ZBrush. Just Blender’s native tools, a 2D illustration as a reference, and a lot of patience. I am sharing the process here — not as a guide or a lesson, but simply because the work deserves to be seen in its full context before you hit play on any of the videos.
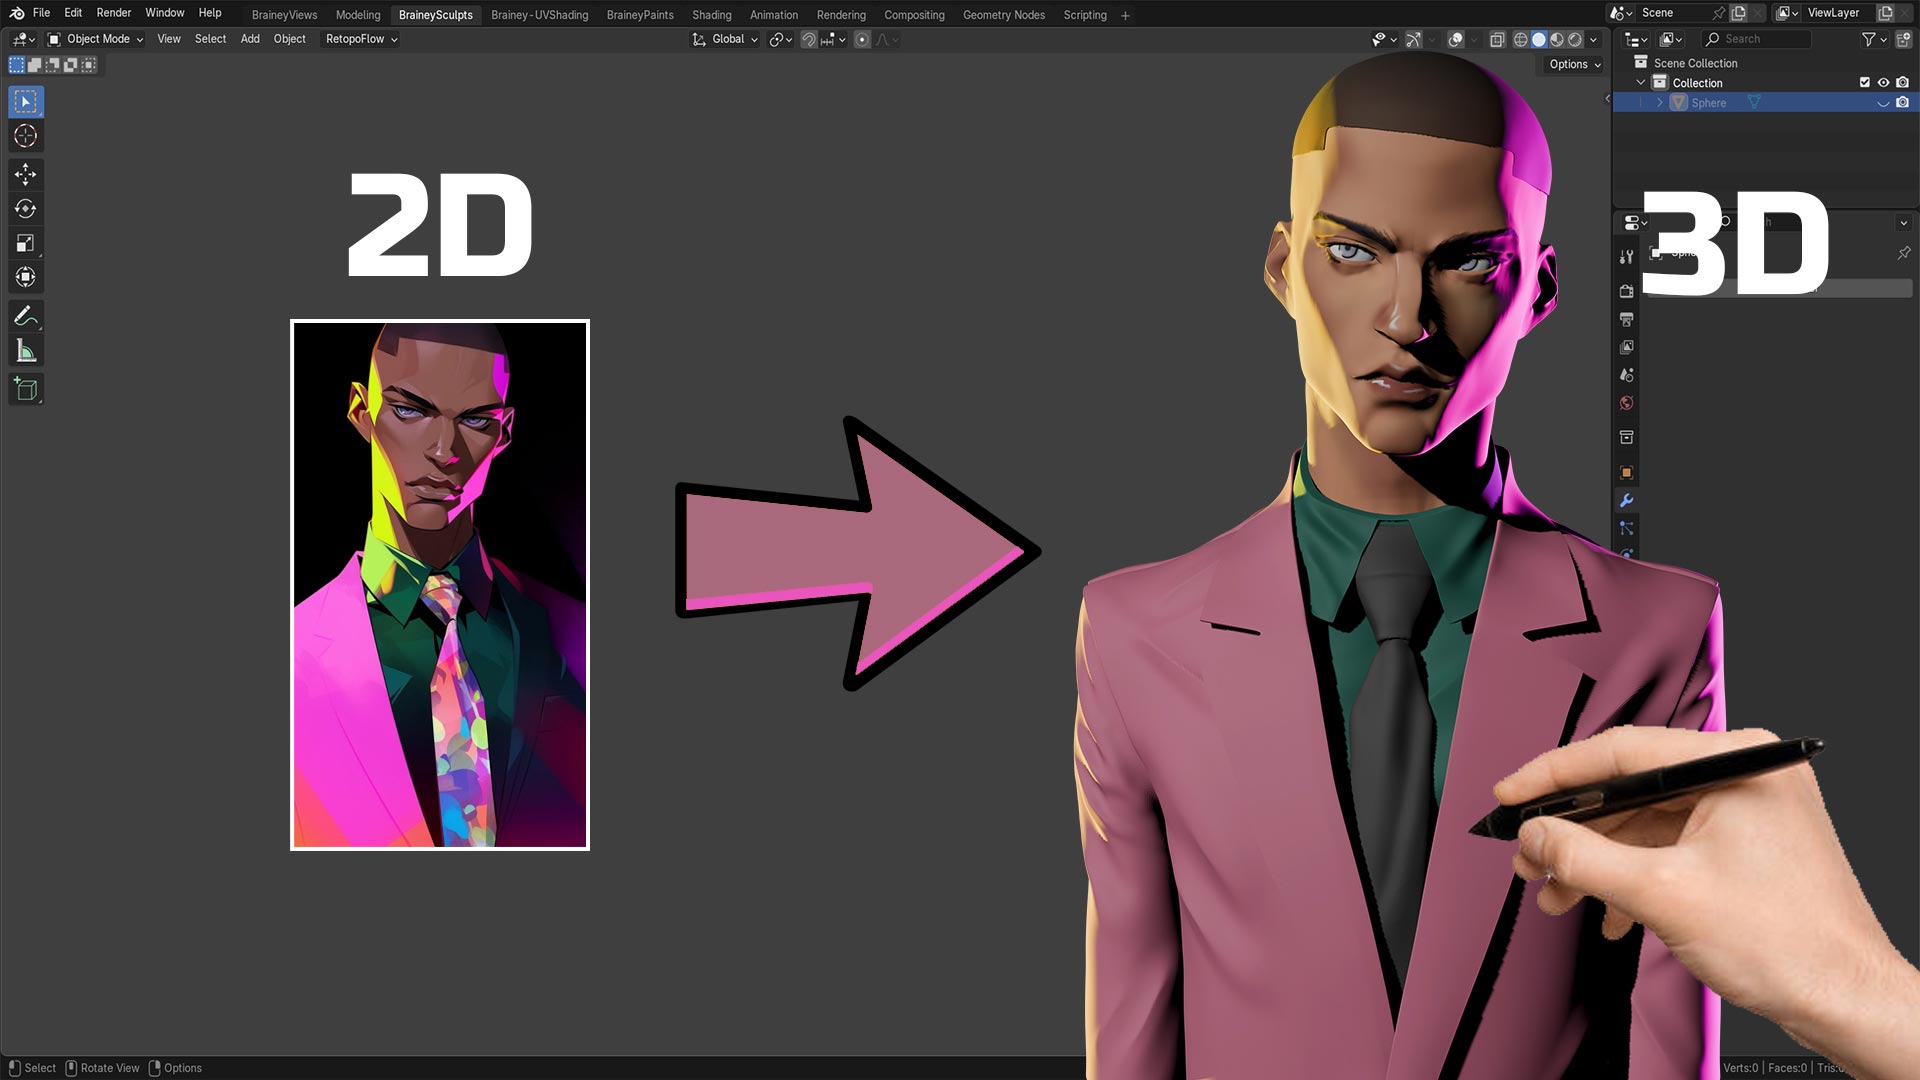
🖼️ It Started with a 2D Illustration
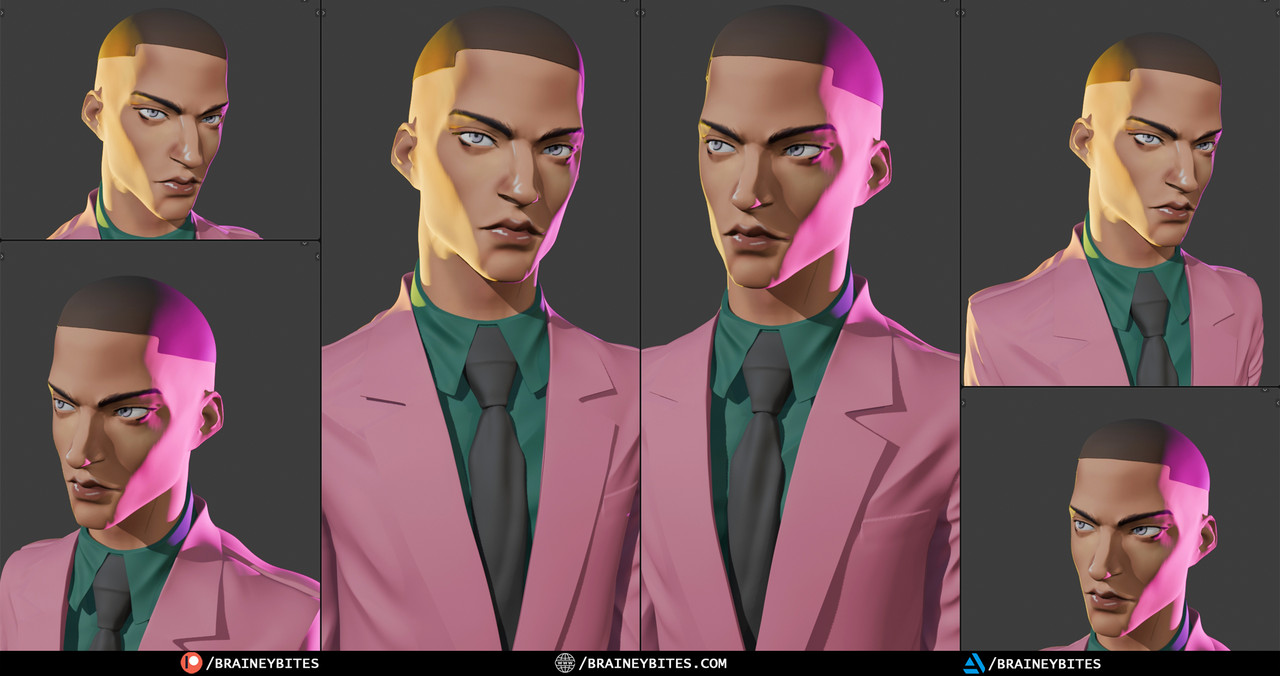
Every 3D character has to start somewhere. For this project, that starting point was a 2D AI-generated illustration — a stylised male portrait wearing a bold pink suit, with dramatic neon lighting in yellow and magenta hitting the face at sharp angles.
The challenge was not just to recreate that character in 3D, but to honour the mood, the drama, and the style of the original piece. A 2D illustration has certain liberties — exaggerated proportions, flat colour zones, atmospheric lighting that does not have to obey the rules of physics. Translating that into a 3D sculpt means making hundreds of decisions that the original artist never had to think about: where does the ear sit in 3D space? How does the jaw curve from the side? Where does light physically hit a face that was originally only ever lit from the painter’s imagination?
These are the kinds of questions that make 3D character work genuinely interesting — and genuinely hard.
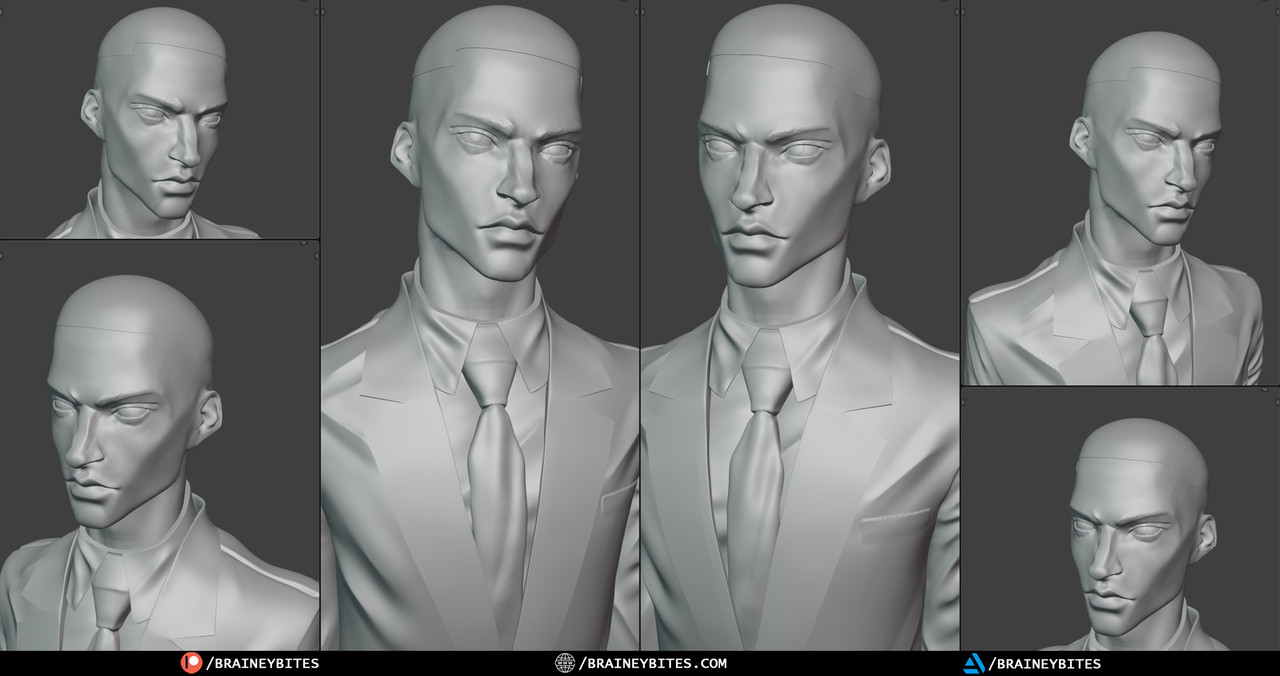
🧱 The Sculpting Phase
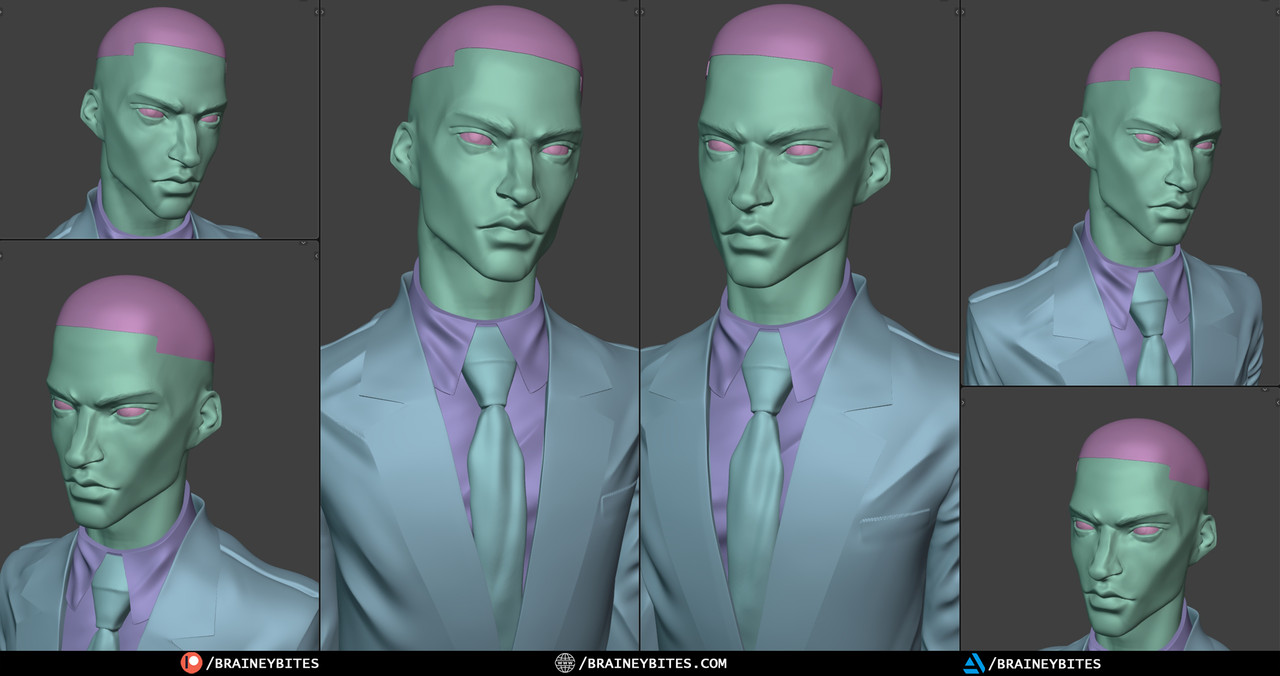
The sculpting was done entirely within Blender’s sculpt mode. Starting from a base mesh, the goal was to build up the primary forms of the face first — the overall shape of the skull, the placement of the brow ridge, the nose bridge, the cheekbones — before moving into finer details.
This phase is the most meditative part of the process. There are no shortcuts and no hacks. It is just the artist and the geometry, slowly pushing and pulling form into existence. You make a mark. You evaluate it. You correct it. You make another mark.
The reference image stayed open throughout this phase — not to copy it mechanically, but to use it as a compass for the character’s personality. The sharp cheekbones, the strong jaw, the slightly narrowed eyes — these are not just anatomical features. They carry attitude. They carry character. Getting them right in 3D meant understanding not just what they look like, but what they mean for the overall feel of the piece.
Blender’s sculpting brushes handled the heavy lifting: the Clay Strips brush for building mass, the Smooth brush to soften transitions, the Crease brush for defining sharper edges around the eyes and the nasolabial folds. The process moves in passes — rough to refined — and the timelapse captures exactly that progression.
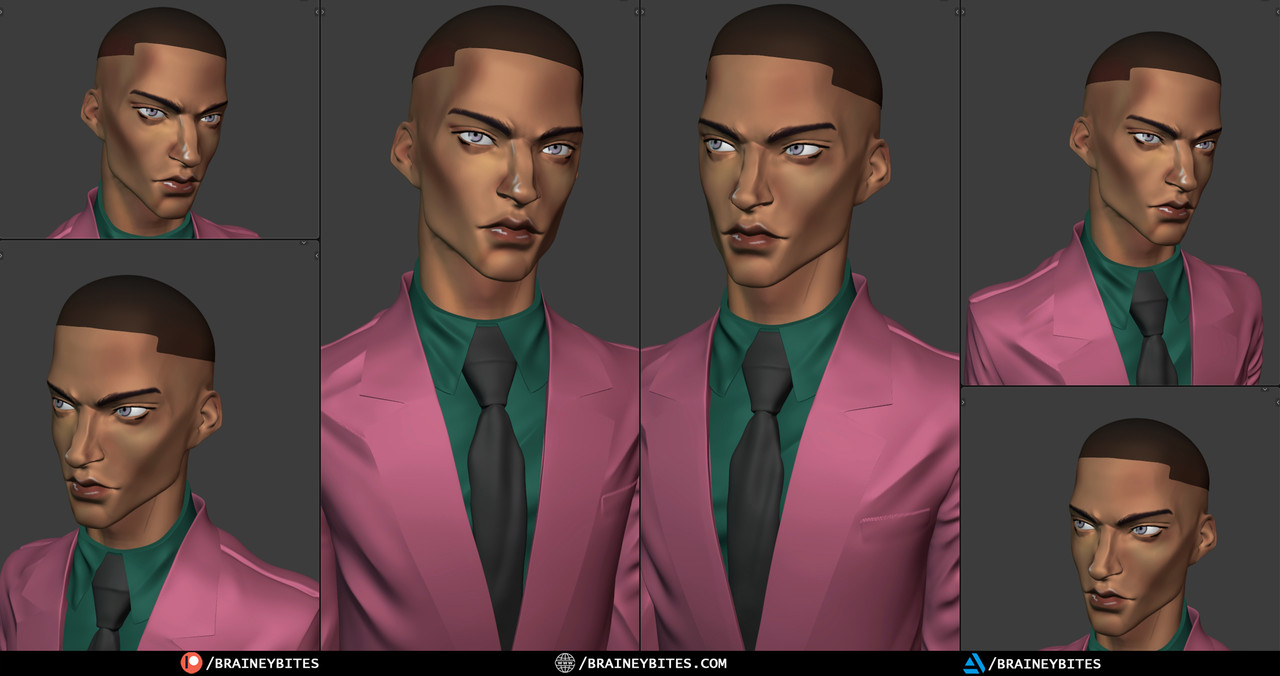
🎨 Texture Painting Directly in Blender
Once the sculpt reached a stage where the forms were reading clearly, the work shifted into Blender’s texture painting tools. This is where the character really starts to feel alive.
Painting a stylised character is different from trying to achieve photorealism. The reference illustration used bold zones of colour — deep brown skin tones, warm highlights, cool shadow tones with a hint of the magenta and yellow lighting baked into the skin itself. The goal in the painting phase was to capture that same energy: not technically accurate subsurface scattering, but a hand-painted quality that feels consistent with the original illustration’s aesthetic.
Colour was applied in passes — a flat base tone first, then shadow areas built up with cooler and darker mixes, then highlights using warmer and more saturated mixes. The clothing — that striking pink suit and deep teal shirt — was painted with attention to fold shadows and fabric highlights to give them a sense of weight and material, even without complex shaders.
This phase is slower and more deliberate than sculpting. Every brushstroke is a decision about colour theory, value, and how light behaves on different surfaces. Watching it in timelapse, it can look almost effortless. In real time, it is anything but.
💡 Lighting & Final Render
The lighting setup was built to echo the mood of the original 2D illustration. A strong yellow key light from above-left. A deep magenta fill from the right. A subtle cool rim from behind to separate the character from the background.
Three-point lighting in 3D is a science and an art simultaneously. The physics of light in Blender’s render engine are accurate — which means you cannot fake it the way a 2D painter can. You have to actually place lights in the correct positions, at the correct intensities, with the correct colour temperatures, and then evaluate the result. Then adjust. Then evaluate again.
The final render came together with a simple dark neutral background that lets the character’s colours do the talking — the warmth of the skin tones, the boldness of the pink suit, and the cinematic lighting all competing for attention in a way that feels intentional and controlled.
🎬 Where to Watch the Full Process
The complete work is available across multiple formats depending on how much you want to see:
- 📽️ Full 40-Minute Timelapse — the complete process condensed into a deeply satisfying watch: BraineyBites
- ⚡ 15-Minute Short Timelapse — the highlights of the process for a quicker experience: BraineyBites
- 👀 5-Minute Sneak Peek — a short preview to give you a taste: BraineyPeeks
- 🎞️ 3-Hour Raw Archive — the full unedited session for those who love watching every real-time decision: BraineyArchives
There is no audio in any version. No commentary, no explanation, no tutorial voiceover. Just the work, playing out visually at whatever pace you choose.

✦ Why Share This at All?
There is a reason process videos exist — and it is not to show off. It is because the process of making something is often more interesting than the finished thing.
A final render is a moment. A process video is a story. It shows the uncertainty, the corrections, the moments where the piece looked wrong before it looked right. It shows that 3D character art is not a series of confident, correct decisions. It is a long conversation between the artist and the work — and watching that conversation happen, even sped up, is genuinely compelling.
That is what BraineyBites is here to document. Not polished tutorials. Not step-by-step guides. Just the real, honest, messy, beautiful process of building 3D art — one sculpt at a time.
If this kind of content is what you’re looking for, subscribe to the channel and follow along. There is a lot more where this came from.