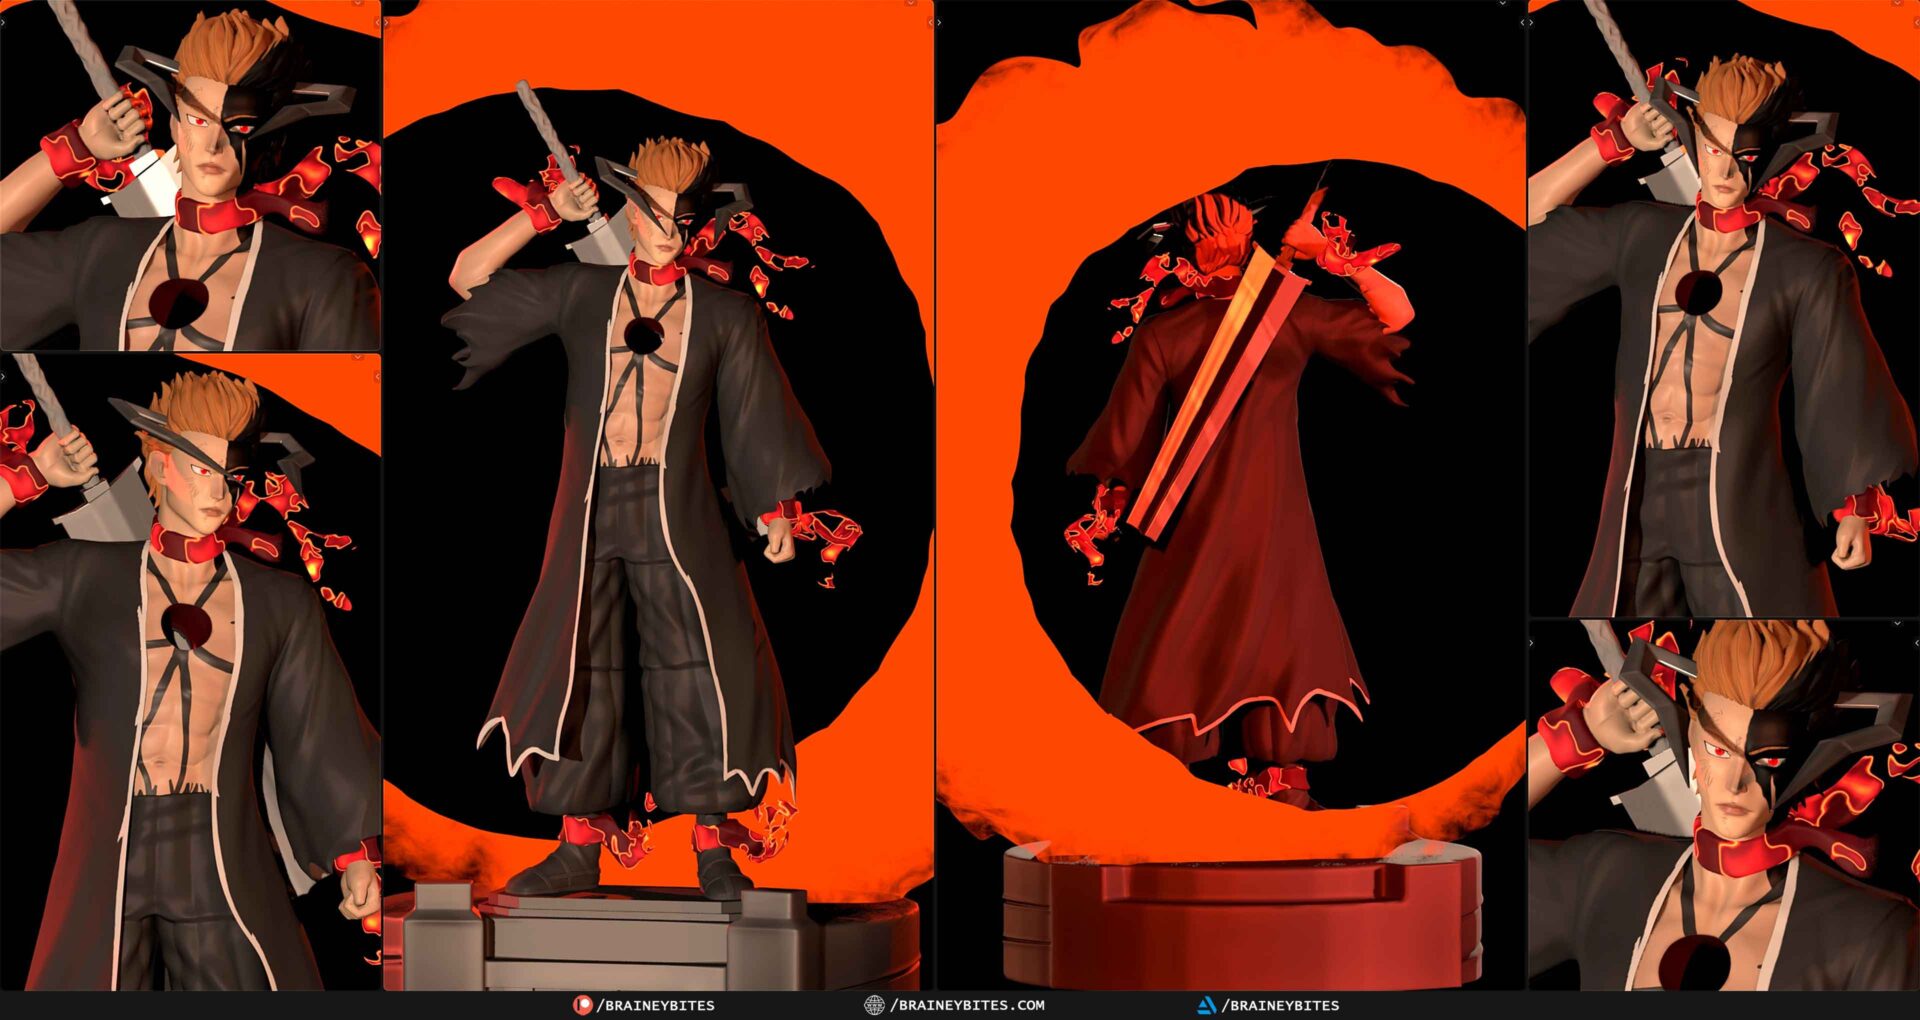
Fifteen Hours With One Sphere
Every character I make starts in the same unpromising way: a default sphere sitting in an empty scene, lit by nothing in particular. There is something quietly reassuring about it. Nothing has gone wrong yet, no decision needs defending, and the whole thing is still entirely possible. Twelve hours later there is an anime character standing there with a sword. Three and a half hours after that, there is a painted figure on my desk I can pick up and turn around in my hand.
This is a writeup of the part in between. It is not a tutorial — there is no narration on the video and there is no instruction here either. It is an honest account of how this particular build actually went, including the stretches that took far longer than they had any right to.
The first hour decides the other eleven
Within a minute or two the sphere stops being a sphere. It gets pulled into a rough skull, a neck appears underneath it, shoulders follow, and suddenly there is something with a front and a back. On the timelapse this passes in a couple of seconds and looks almost careless.
It is not. Nearly every problem I ran into later traced straight back to this stage. When a jaw refuses to sit right at hour four, or the ears end up slightly too high and the whole head reads as lopsided, the cause is almost never the detail work. It is a proportion I failed to resolve while the mesh was still simple enough to fix in three clicks. I have learned to stay here longer than feels productive, because this is the cheapest moment in the entire build to be wrong.

The head got rebuilt more than anything else
Face planes first, then the brow and cheekbones, then the eye sockets. The ears were their own small war and went through several passes before they sat properly against the skull — they always do, and I have stopped pretending otherwise. The nose and mouth came last, because they are the two shapes easiest to overwork, and once you have overworked them you tend to keep going rather than admit it.
Somewhere in there the eyes went in, and that is the closest thing sculpting has to flipping a switch. Before it you are pushing clay around and judging shapes against your own sense of what looks right. After it there is a face looking back at you, and every decision from that point gets measured against whether the character seems alive. It is a much less forgiving standard and it arrives all at once.

Hair is mostly an exercise in restraint
The hair was blocked in as large shapes first and only split into strands much later. Stylized anime hair is deceptive that way. The instinct is to keep adding strands until it looks detailed, and every single time that instinct is wrong — the silhouette carries the read, and past a certain point extra strands only make the shape mushier. The hardest part of that stage was stopping.
The body, and then the hands
Torso, chest, back and abdominals, then a pass over the whole figure to catch the proportions that had quietly drifted while I was busy admiring the head. Arms, then hands and fingers, then legs and feet.
The hands took three times longer than planned, which is the only genuinely reliable prediction I can make about any sculpt. A closed fist around a hilt is worse again, because the fingers have to wrap something real and every knuckle has to sit in a believable line. It is fiddly, unglamorous work, and on the timelapse it is the part where the mesh appears to barely change for minutes at a time.
Cloth I sculpted rather than simulated
The shihakusho folds are placed by hand. I did not simulate any of it. Simulation gives you cloth that is physically plausible and compositionally boring, and since this was always going to end up as a physical object, the folds needed to read at figure scale — deliberate, readable, and pointing where I wanted the eye to go rather than where gravity happened to put them.
The sword and the display base were built last, partly because they are the most straightforward part of the whole thing, and it is pleasant to end a long sculpting day on something that behaves.

Then the colour lands
All the colour on this went on directly in sculpt mode, painted onto vertex colour attributes rather than image textures. No UV unwrapping detour, no texture set to manage, everything living in one file.
Watching that stage back is the part that always surprises me. The form does not change at all. Every shape is already there. But the sculpt does not read as a character until the colour arrives — before it the thing is a study, and afterwards it is a person. As someone who spends the overwhelming majority of a session on form, I find that slightly humbling. The shapes do the work, but the paint is what makes the work legible.

The part where a file becomes an object
Print preparation is where the project changes character entirely. The sculpt is around 2.7 million triangles, which is fine for a render and absurd for a slicer. The print version comes down to 411,712 triangles, split into three parts and sized to roughly 198 by 134 by 179 millimetres.
This stage is unglamorous in a way no timelapse can really flatter: checking wall thickness, hunting for geometry that will not survive the transition, deciding where a part can be split so the seam falls somewhere forgiving. One piece still carries a handful of non-manifold edges I want to clean up before the files go out — eight boundary edges and six non-manifold ones, small enough to ignore in Blender and exactly the kind of thing that makes a slicer behave strangely later.
Three and a half hours of patience
Printed on an Elegoo at 0.2 millimetre layers with tree supports. Then the genuinely slow part: support removal, cleanup, primer, base coats, and the detail pass by hand.
Nobody films this stage because there is nothing dramatic in it. It is a person with a pair of clippers making a lot of small decisions about how hard to pull. But it is also where a print either becomes a figure or becomes a lesson, and it deserves more respect than it usually gets. The grey primed print standing on the bench before any colour goes on is still my favourite single moment in this whole build.

The version nobody posts
The timelapse compresses twelve hours into something watchable, and the short cut compresses it further. Both are honest edits — nothing is reordered, every stage appears in the order it actually happened — but compression inevitably makes the process look smoother and more decisive than it was.
So the completely unedited sessions go up too, both of them: the full sculpt, and the full print and paint session. Pauses, re-dos, the stretches where I clearly was not sure what I was doing. If you are learning, that version is probably more useful than the timelapse. It is certainly more accurate.
The print files go up as well, which is the strangest part of the whole thing to sit with — that a default sphere in an empty scene can end up as an object on somebody else’s shelf.
