Ever wondered how your favorite characters leap from concept to 3D reality? In my latest YouTube tutorial, I break down the core steps I follow to sculpt a fully articulated Sentry, straight from a blank Blender scene to a posed, render‑ready hero. Below is a taste of the process; for the full deep dive, check out the video!
1. Gathering References
Before I ever open Blender, I collect anatomy sheets and key character shots—in this case, classic Sentry poses and muscle diagrams. Having clear front, side, and three‑quarter views keeps my forms accurate and believable.
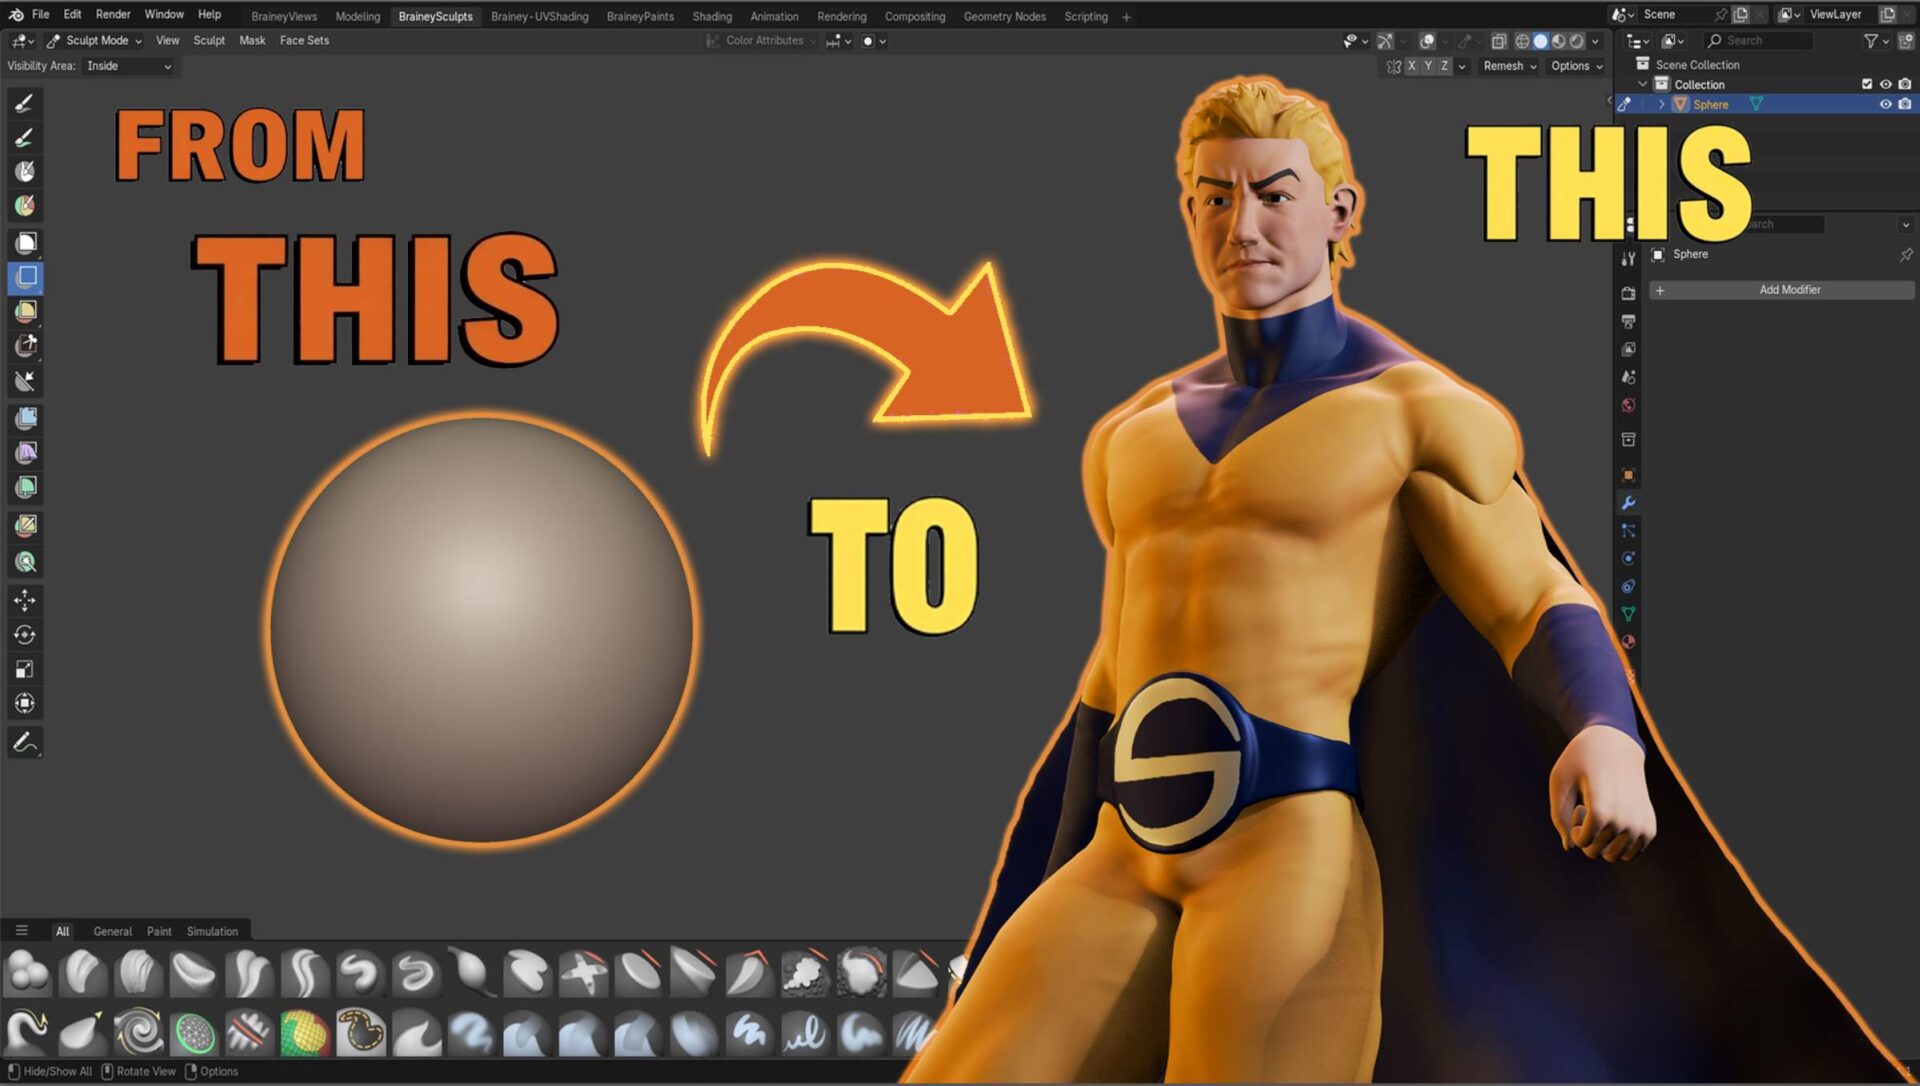
2. Blocking Out with Spheres
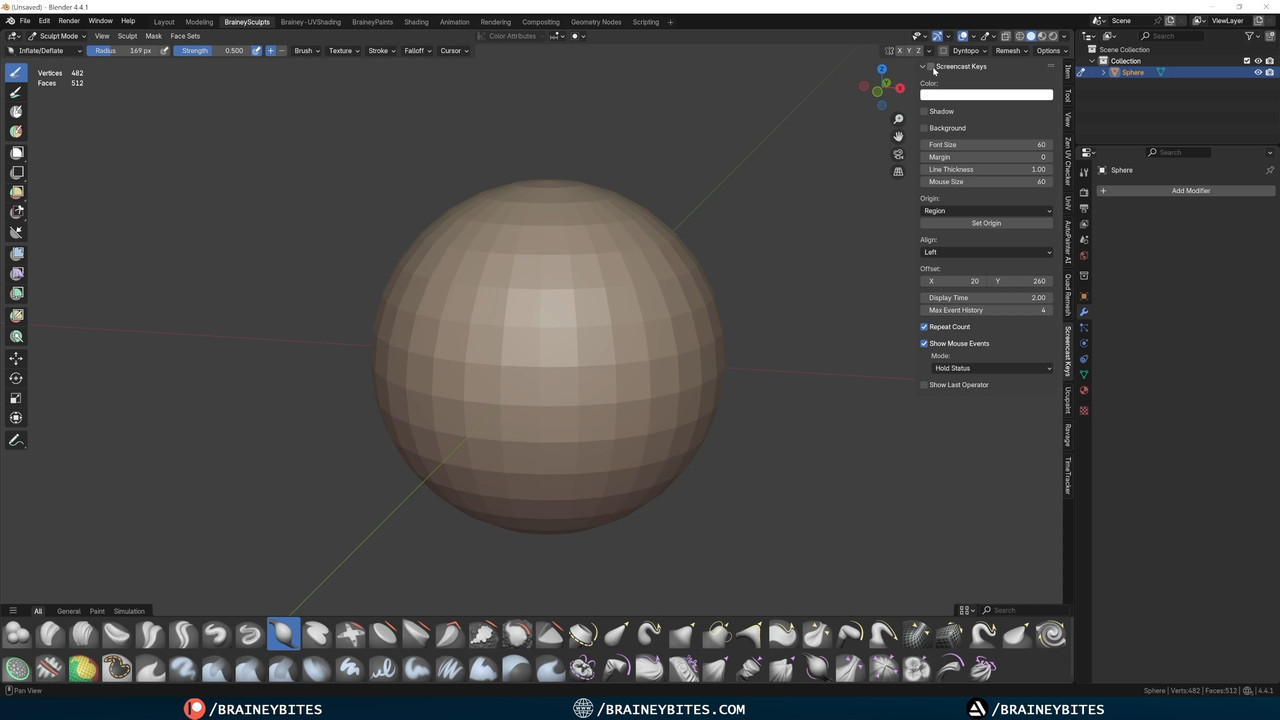
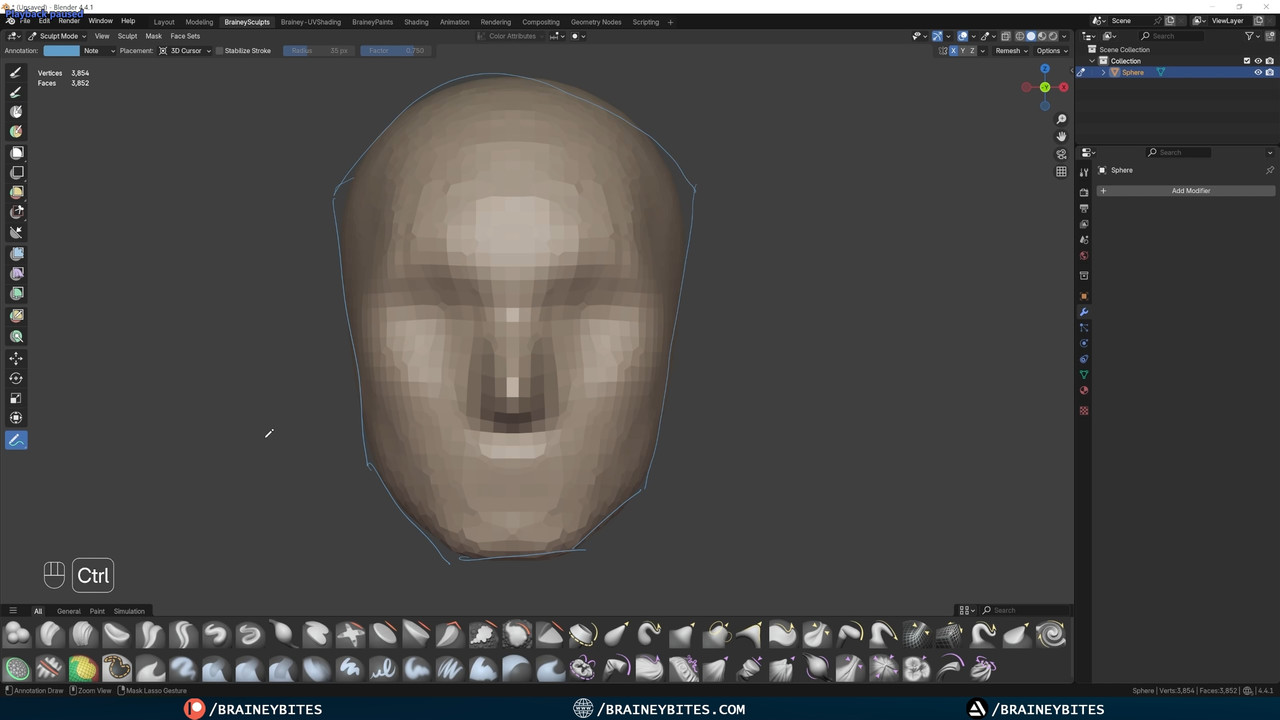
- Head First: I start with a simple UV sphere. In Sculpt Mode, I activate symmetry and grab the Grab Brush to rough out the skull and jawline.
- Volume & Resolution: Hitting Ctrl+R lets me remesh at a voxel size that balances detail with performance—just enough to add and remove mass with the Clay Strips or Draw Brushes.
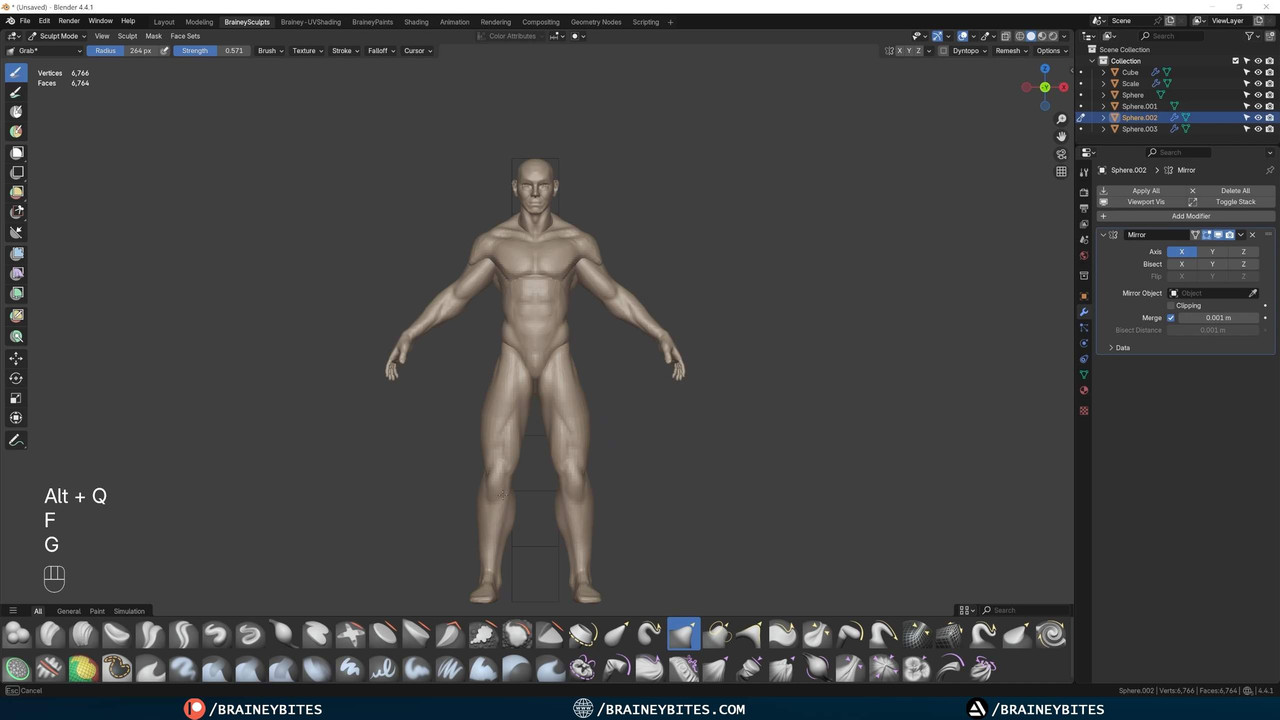
3. Building the Body
Once the head feels right, I duplicate a new sphere for the torso. Using the same grab, clay, and crease‑sharp brushes, I carve out pectorals, abs, and ribs—always flipping back to my references to ensure anatomical correctness.
4. Detailing Limbs & Features
- Arms & Legs: Each limb gets its own sphere, sculpted in stages: block‑out → mid‑detail → fine anatomy.
- Facial Elements: Brows, cheekbones, and subtle expression lines come with targeted use of the Crease Brush.
- Hair & Cape Base: I rough in the cape and hair as separate meshes—sculpted for flow and motion, ready for final polish.
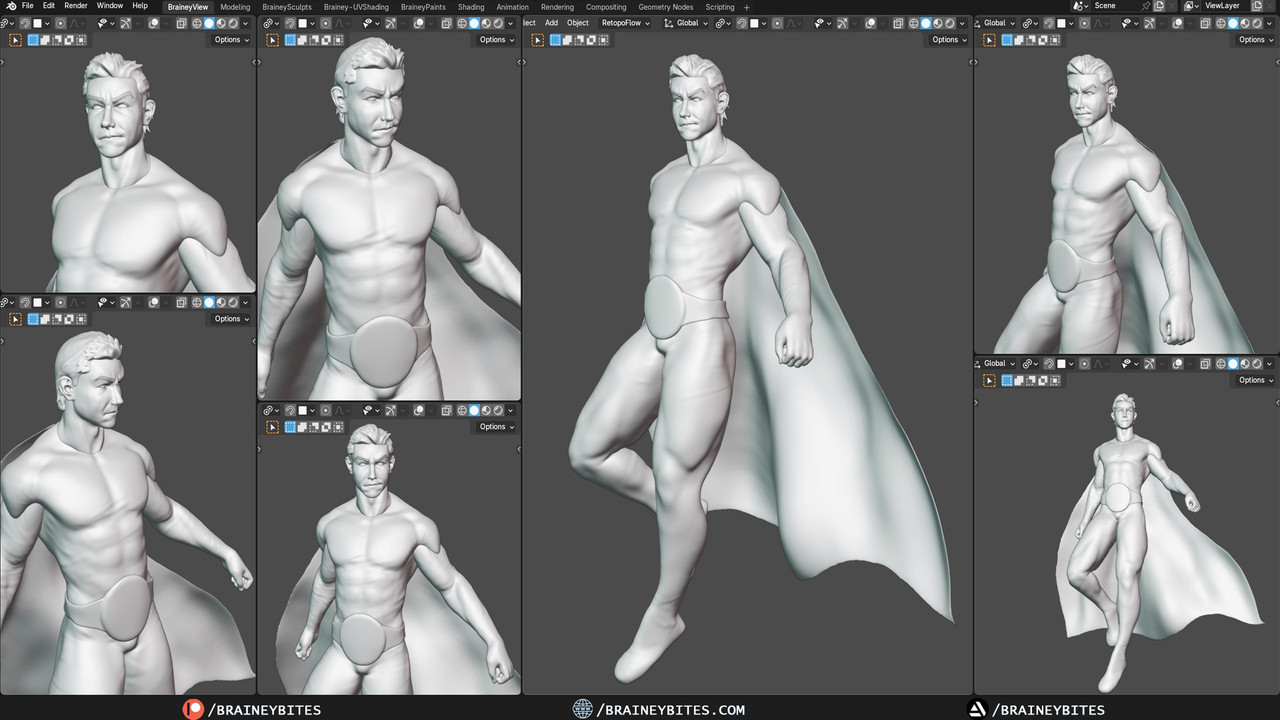
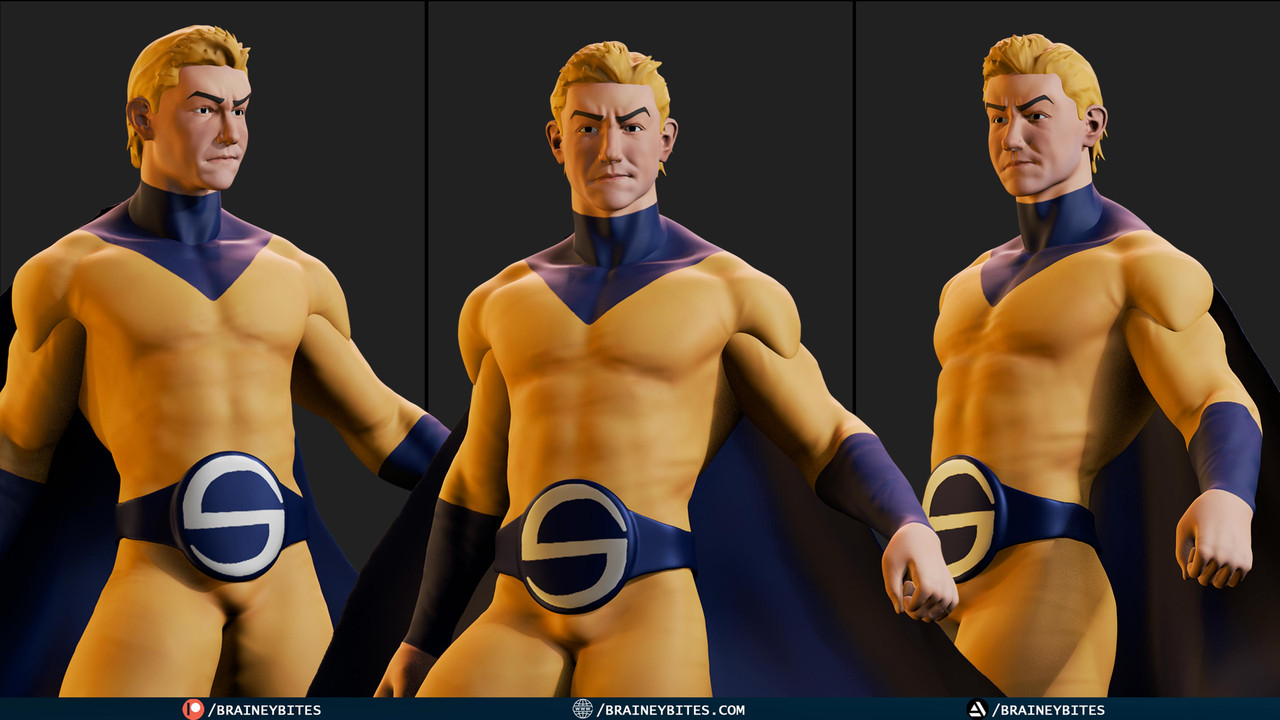
5. Refinement & Color
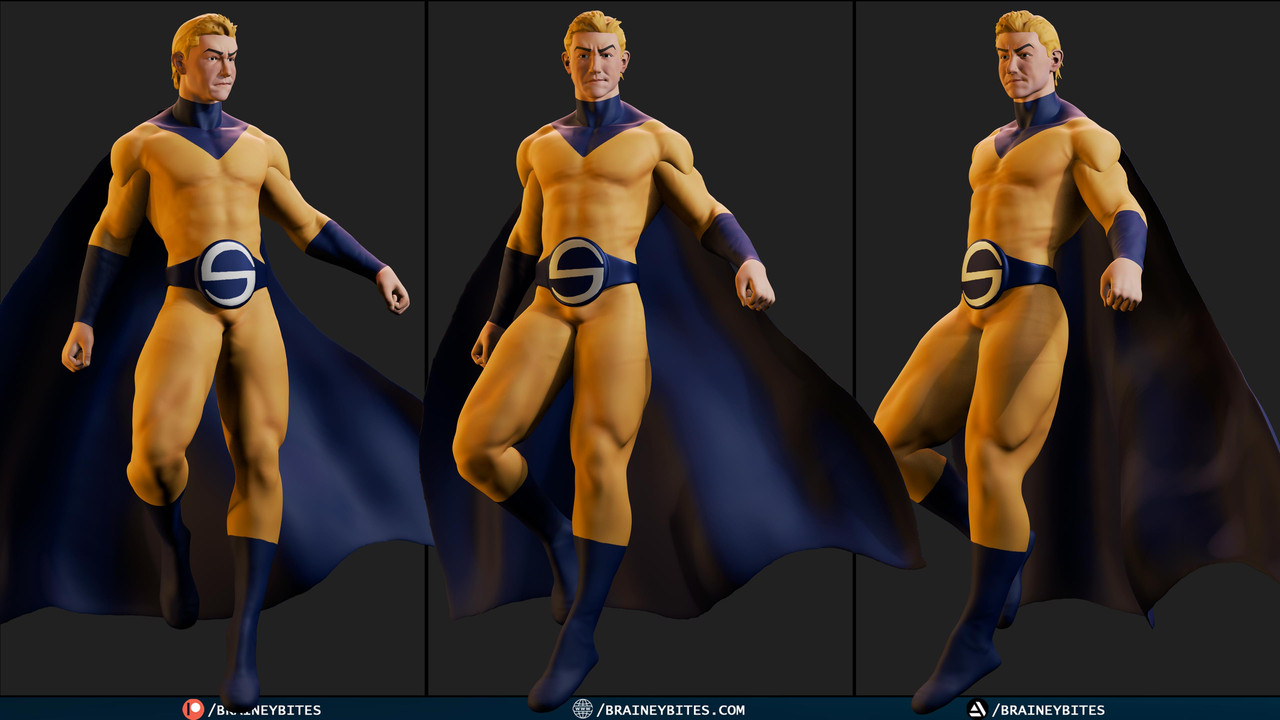
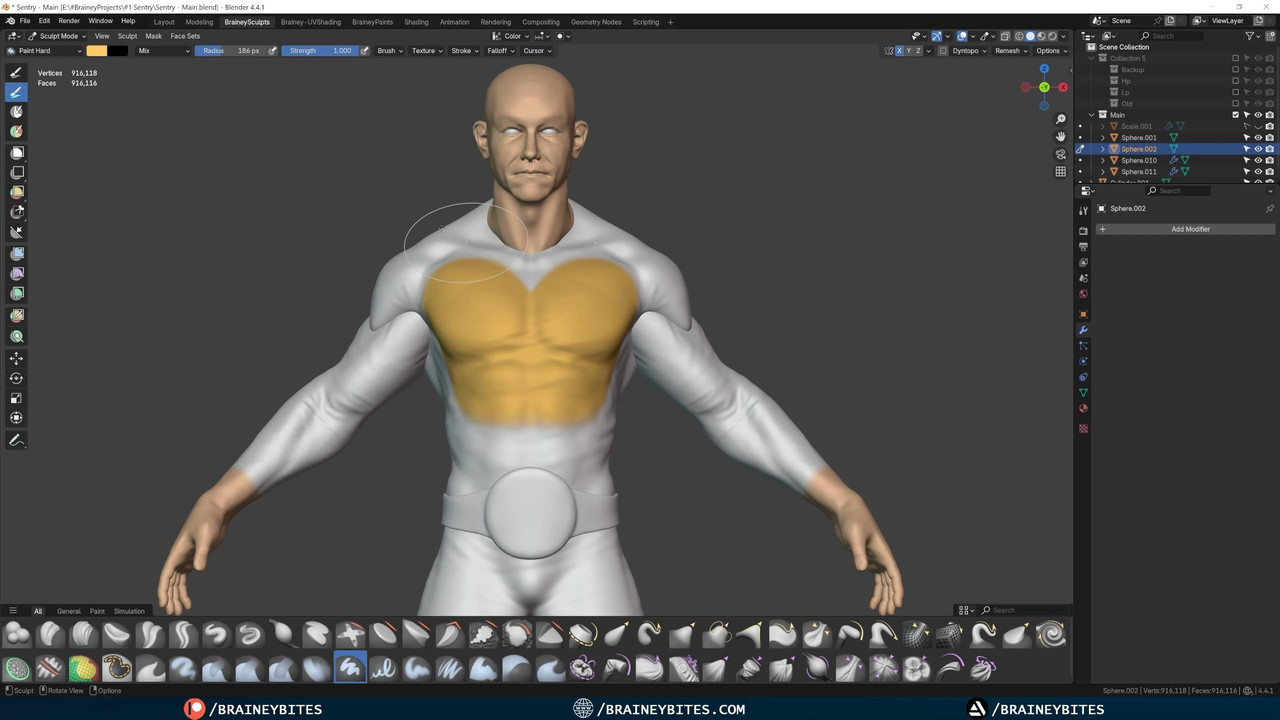
With proportions locked down, I revisit each part for secondary detail: muscle striations, tiny skin creases, and armor embellishments. Then, in Sculpt Paint Mode, I lay down base colors—pulling from my references to match Sentry’s iconic gold and black palette.
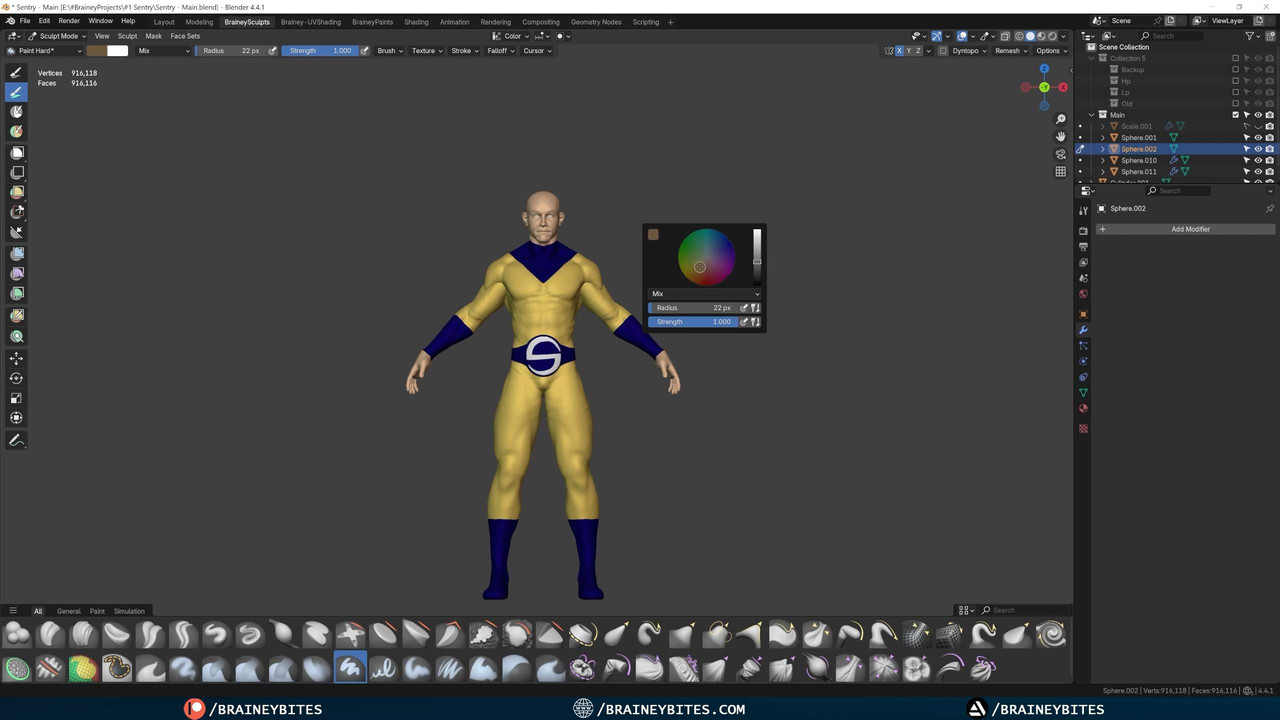
6. Rigging & Posing
Finally, I enable Blender’s Rigify addon to generate a quick rig. A few tweaks to the bone placements, and my Sentry is posed in a dynamic stance—perfect for that final render.
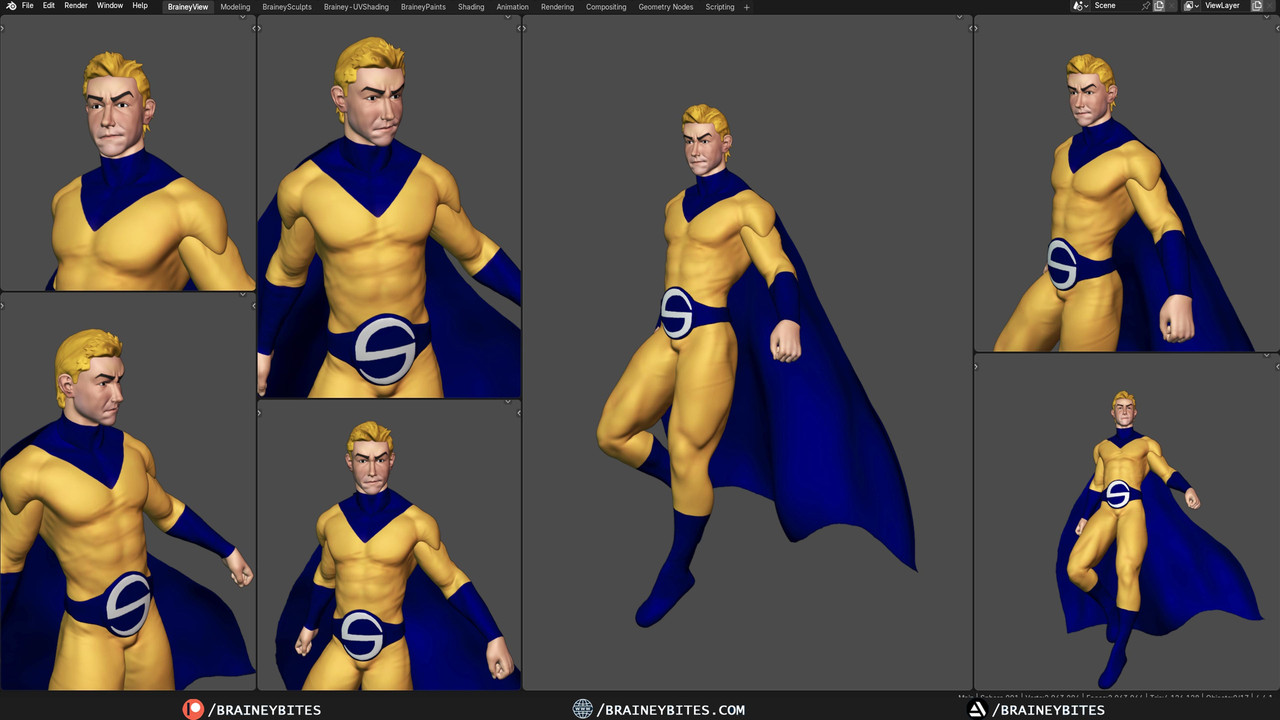
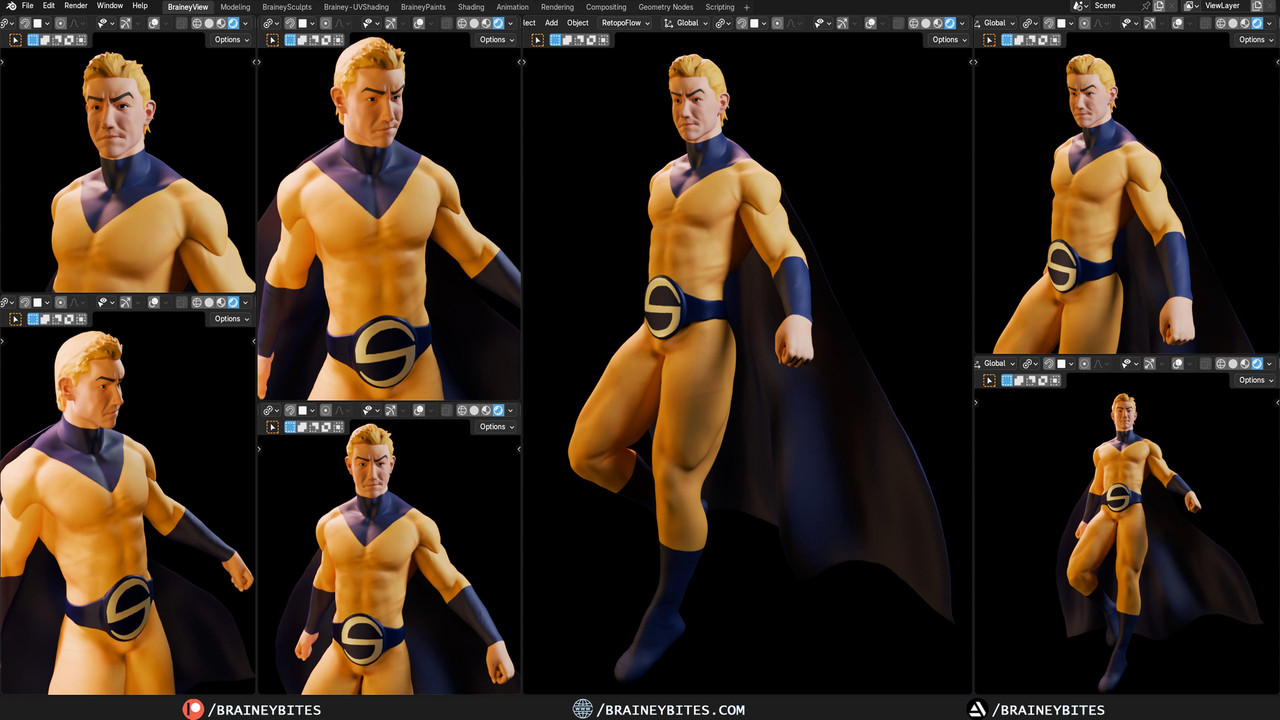
This is only the headline—my YouTube tutorial walks you through each stage with live screen capture, brush settings, and time‑saving tips so you can sculpt like a pro. Ready to see it in action?
Whether you’re tackling your own hero or just curious about digital sculpting, this workflow will give you the foundation to bring any character to life. See you in Blender!